UV Damage to Your Car’s Paint: How to Prevent It By Auto Body Experts
- Jun 9, 2025
- 19 min read

Your car’s paint is more than just eye candy—it’s a protective shield that guards your vehicle against rust, scratches, and the elements. However, one of the most insidious threats to that glossy finish is ultraviolet (UV) radiation. Left unchecked, UV rays can cause your paint to fade, oxidize, and peel, transforming your once-pristine ride into a dull, lackluster shadow of its former self. Fortunately, the auto body experts at Park Lane Collision in Montreal have seen it all and know exactly how to help you keep your paint looking showroom-new. In this comprehensive guide, we’ll explain why UV damage happens, how to spot the early signs, practical prevention strategies, and restoration techniques to bring back the shine. Let’s dive in!
Understanding UV Damage to Auto Body Paint
Before you can effectively guard against UV damage, it’s crucial to understand what happens when sunlight and your car’s finish collide. This section will explore the science behind UV radiation, its specific effect on automotive paint, and the environmental factors that exacerbate the problem—especially in Montreal’s unique climate.
1. What Are UV Rays and How Do They Affect Paint?
UV radiation is a form of electromagnetic energy emitted by the sun. While essential for life on Earth—helping our bodies produce vitamin D—UV rays can also wreak havoc on non-living surfaces, including your car’s paint. Here’s how:
UV Spectrum Breakdown
UVA (320-400 nm): Penetrates deep into the paint, breaking down chemical bonds and accelerating aging.
UVB (280-320 nm): Causes more surface-level damage, such as fading and chalking.
UVC (100-280 nm): Mostly absorbed by the ozone layer and does not reach the Earth’s surface.
Chemical Breakdown of ClearcoatModern automotive paint consists of three layers: primer, basecoat (pigmented layer), and clearcoat (protective transparent layer). The clearcoat’s purpose is to act as a shield against UV radiation, contaminants, and minor abrasions. When UVA rays penetrate the clearcoat, they break down the molecular bonds that hold the clearcoat together. Over time, this leads to oxidation of the basecoat pigments:
UV Transmittance: UV rays penetrate the clearcoat.
Bond Disruption: UV energy breaks the polymer chains in the clearcoat.
Oxidation Initiation: With the clearcoat compromised, oxygen reacts with the basecoat, causing it to fade and lose vibrancy.
Layer Separation: Eventually, the weakened clearcoat can crack, peel, or flake off, leaving the basecoat directly exposed to further UV attack.
Signs of UV-Induced Deterioration
Dull Finish: Loss of gloss despite regular washing and waxing.
Chalking: A white, powdery residue that appears on older paints (common on vintage and classic cars).
Color Shift: Original color may shift slightly, especially on darker hues that absorb more heat and UV (e.g., deep blues, blacks).
By grasping the mechanics of UV-related chemical breakdown, you’ll better appreciate why preventative maintenance—rather than reactive repair—is key for preserving your auto body finish.
2. Montreal’s Climate and UV Intensity
Montreal experiences a wide range of weather conditions throughout the year, which can amplify UV damage in several ways:
Seasonal Variations in UV Index
Summer Peaks: From May through August, Montreal’s UV index often climbs to “High” (6-7) or “Very High” (8-10) levels. Those long, sunny days can accelerate paint oxidation if your vehicle is left unprotected.
Spring & Fall: Even when temperatures are mild, UV levels can still be strong, especially on clear days. Reflective surfaces like sidewalks, buildings, and water bodies can bounce UV rays onto your car, compounding exposure.
Winter Reflection: Snow cover acts like a giant mirror, reflecting UV light not just downward but upward. Even on cloudy winter days, UV rays can penetrate and harm unprotected clearcoat.
Urban Heat Island Effect
Concrete & Asphalt: The abundance of dark surfaces in urban areas absorbs heat and radiates it back, creating microclimates that intensify solar radiation. Your car parked downtown on a warm summer day can experience surface temperatures much higher than ambient air, stressing the paint layers.
Repeated Thermal Stress: Continuous cycles of heating during the day and cooling at night can cause the paint and clearcoat to expand and contract, leading to micro-cracks that allow UV penetration.
Airborne Pollutants & Their Synergy with UV
Industrial Emissions: While Montreal’s air quality is generally good, industrial zones and heavy traffic corridors can have higher levels of sulfur dioxide (SO₂), nitrogen oxides (NOₓ), and particulate matter. These pollutants combine with UV to create mild acid rain, which can etch and dull your clearcoat.
Urban Contaminants: Things like brake dust, tree sap, bird droppings, and road grime may not be UV themselves, but they hold moist pollutants against your paint, making it more susceptible to UV degradation.
By understanding Montreal’s specific climate challenges—intense summer sun, reflective snow, and urban pollution—you’ll see why a multi-pronged approach to UV protection is essential. In the next section, we’ll dive into practical, proactive measures you can take to safeguard your car’s auto body finish against the relentless Montreal sun.
3. Types of Paint Finishes and Their UV Resistance
Not all paint finishes are created equal when it comes to UV resilience. Knowing which finish you have—and how it responds to UV exposure—can help you choose the right protection strategy:
Standard Basecoat/Clearcoat Finishes
Description: The most common factory finish, consisting of a colored basecoat layer followed by a clearcoat.
UV Resistance: The clearcoat provides a basic level of UV protection, but it’s susceptible to oxidation and breakdown if not maintained.
Life Expectancy: Generally, 3–5 years of optimal protection before signs of fading appear without intervention.
Acrylic Lacquer
Description: Once popular in vintage cars, lacquer uses a solvent-based formula that dries quickly and offers a glossy “wet look.”
UV Resistance: Lacquer is highly prone to UV damage and oxidation, leading to “crazing” (fine cracks) and a chalky appearance.
Life Expectancy: Often less than 1–2 years in harsh sunlight—one reason why most modern auto body shops, including Park Lane Collision, recommend transitioning away from lacquer for daily-driven vehicles.
Polyurethane and Urethane-Based Finishes
Description: Advanced formulations that deliver greater durability, flexibility, and UV resistance compared to lacquer or older acrylics.
UV Resistance: These finishes incorporate specialized UV inhibitors that slow down clearcoat breakdown, making them a staple in modern auto body shops.
Life Expectancy: With proper maintenance, high-quality urethane clearcoats can resist UV damage for 7–10 years or more.
Ceramic and Nano-Composite Coatings
Description: Technically not “paint,” but applied on top of clearcoat. These coatings bond at a molecular level to create a glass-like layer.
UV Resistance: Offer superior UV and chemical resistance by minimizing surface porosity and reflecting UV rays.
Life Expectancy: Depending on the product (DIY vs. professional-grade), ceramic coatings can last anywhere from 1 year (entry-level) up to 5 years (top-tier professional applications).
Understanding your vehicle’s paint finish is crucial for tailoring a UV protection plan. A standard basecoat/clearcoat finish benefits immensely from regular waxing and detailing, while specialized finishes like ceramic coatings warrant a more “set and forget” approach with occasional top-ups. In the next sections, we’ll cover prevention and restoration methods for each kind of finish to ensure your Montreal auto body paint stays vibrant year after year.

Proactive Prevention—Shielding Your Auto Body from UV Harm
Now that you know why UV rays are your paint’s arch-nemesis, let’s tackle prevention head-on. The most effective defense is a combination of daily habits, protective products, and strategic choices to minimize UV exposure. In this section, our Montreal auto body experts at Park Lane Collision will walk you through three powerful prevention strategies: regular washing and quick-drying, application of UV-blocking waxes and sealants, and advanced protective coatings like ceramic and paint protection film (PPF).
1. Consistent Washing & Gentle Drying: The First Line of Defense
Dirt, grime, and contaminants can hold moisture and pollutants against your paint, making it far easier for UV rays to penetrate and break down the clearcoat. Regular washing — done correctly — isn’t just about aesthetics; it’s a critical step in UV prevention.
Choosing the Right Car Shampoo
pH-Neutral vs. Detergent-Based: Always use a pH-neutral automotive shampoo designed for auto body finishes. Detergent-based or household cleaning products, like dish soap, strip away wax and degrade the clearcoat’s protective properties.
Contaminant-Lifting Agents: Opt for shampoos with surfactants that lift contaminants without being overly abrasive. Ingredients labeled “paint safe” or “hydrophobic” indicate formulas that won’t prematurely degrade your clearcoat’s UV inhibitors.
Washing Frequency and Timing
Bi-Weekly Routine: Aim to wash your car every 1–2 weeks, especially during Montreal’s pollen season (spring) and harsh winter months when salt accumulation can be a major issue. During peak pollen or salt periods, a weekly wash is ideal.
Shade vs. Direct Sun: Whenever possible, wash your car in the shade or during early morning/late afternoon to avoid washing under scorching sun. High temperatures can cause soap and water to dry too quickly, leaving mineral spots and reducing cleaning effectiveness.
Proper Drying Techniques
Microfiber Towels & Blowers: After rinsing, use plush microfiber towels to pat and blot-dry surfaces. Alternatively, a leaf blower or forced-air blower (set to low) can whisk away water without physical contact, reducing the risk of minor scratches.
Avoid Air-Drying: Leaving water droplets to evaporate on the paint creates mineral deposits that can etch into the clearcoat’s surface. Over time, these deposits cause micro-abrasions that scatter light and make paint appear dull, increasing UV susceptibility.
Tools & Best Practices
Two-Bucket Method: One bucket for soapy water, another with clean rinse water. This reduces the chance of rubbing abrasive grit back onto your paint.
Soft Wool or Microfiber Mitt: Gently wash in straight passes, not in circles, to avoid swirl marks.
Stop-and-Go: Rinse your wash mitt frequently to eliminate trapped debris.
By staying on top of washing and drying, you remove particles that can abrade the clearcoat and compromise its UV defense. Consistent maintenance sets the stage for more advanced protection measures.
2. Waxing, Sealants & UV-Blocking Products
Wax and sealants function like sunscreen for your car’s auto body finish. They create a sacrificial barrier that absorbs UV rays and prevents chemical pollutants from reaching the clearcoat. Let’s explore your options:
Natural vs. Synthetic Waxes
Carnauba-Based Wax: Derived from palm leaves, carnauba wax delivers a deep, warm glow and strong water-beading properties. However, it typically lasts only 2–3 months, especially in intense UV exposure.
Synthetic Polymer Sealants: These man-made formulas offer a slicker, more reflective finish and can last 6–8 months. They often contain UV-inhibiting additives specifically designed to block sun damage.
Applying Wax & Sealant Correctly
Clean Canvas: Ensure your car is fully washed, dried, and free of contaminants. Do not wax over dirt or old wax residue.
Thin, Even Coat: Use a foam or microfiber applicator to spread a thin, even layer. Overapplication leads to streaks and uneven protection.
Buff to Brilliance: Allow the product to haze (usually 5–10 minutes in shade), then buff gently with a clean microfiber cloth. Buff with light pressure in straight passes to avoid swirl marks.
Product Recommendations
Meguiar’s Ultimate Liquid Wax: A synthetic sealant with excellent UV inhibitors, offering up to six months of protection.
Collinite No. 845 Insulator Wax: A semi-synthetic wax known for its durability, especially in harsh climates.
Gtechniq C2 Liquid Crystal: A professional-grade paint sealant with strong UV protection and high gloss.
When to Reapply
Monthly Inspections: Check your car’s finish monthly, especially after extreme weather events. If water no longer beads or forms sheet-like patterns, it’s time for a top-up.
Seasonal Application Plan:
Spring: Apply a fresh coat of synthetic sealant to protect against pollen and rain.
Summer: Reapply or top up mid-season to combat intense UV.
Fall: Add another layer before winter to protect against road salt.
Winter: Consider a liquid wax that seals and prevents salt from reaching the clearcoat.
Waxing and sealing is a cost-effective, DIY-friendly step that pays dividends by slowing UV-induced oxidation. But for maximal defense, let’s explore cutting-edge options that take protection to the next level.
3. Advanced Protection: Ceramic Coatings & Paint Protection Film (PPF)
For Montreal drivers who demand superior, long-lasting defense against UV damage (and other hazards), ceramic coatings and PPF are game-changers. These high-tech solutions create a robust barrier that significantly extends the life of your auto body paint.
Ceramic Coatings
Ceramic coatings use nanotechnology to bond to the clearcoat on a molecular level. Once cured, they form a hydrophobic, UV-reflective layer that is far more durable than traditional wax or sealants:
Benefits of Ceramic Coatings
UV Defense: Ceramic coatings contain UV inhibitors that block a substantial percentage of UVA/UVB rays, preventing oxidative breakdown of the clearcoat.
Hydrophobic Properties: Water and contaminants bead up and roll off the surface, reducing the frequency of washes and minimizing the chance of corrosive deposits.
Enhanced Gloss & Depth: The nano-ceramic layer refracts light, creating a richer, glossier appearance—think of it as a glazing that amplifies your color’s vibrancy.
Chemical Resistance: Harsh pollutants (acid rain, bird droppings, tree sap) have a harder time bonding to the surface, allowing you to wipe them away easily.
Application Process
Surface Prep: Paint must be meticulously cleaned, decontaminated with a clay bar, and polished to remove swirl marks. Any imperfections trapped under the coating become magnified.
Panel-by-Panel Application: A carefully measured drop of coating is applied with a foam applicator, then leveled out before wiping away any excess.
Curing Period: The vehicle needs to sit in a controlled environment (temperature- and humidity-regulated) for 12–24 hours to allow the coating to bond fully.
Professional vs. DIY Ceramic
Professional-Grade: These formulas (e.g., Gtechniq Crystal Serum, CarPro CQuartz UK) offer 2–5 years of protection and require precise application protocols.
DIY Sprays: Consumer-level ceramic sprays provide some hydrophobic and UV defense but typically last only a few months. They’re a good interim solution if you’re on a tighter budget or need a quick refresh.
Maintenance & Longevity
Gentle Washing: Use a pH-neutral shampoo, avoiding abrasive brushes. Ceramic-coated surfaces can still scratch if aggressive scrubbing is used.
Routine Inspections: A yearly inspection (and possible reapplication of a top-up spray) helps maintain the coating’s protective properties and sheen.
Paint Protection Film (PPF)
Paint protection film is a clear, thermoplastic urethane layer applied over vulnerable areas to guard against physical damage and UV exposure:
Benefits of PPF
Physical Barrier: PPF protects against rock chips, minor scratches, and road debris—common culprits that weaken clearcoat’s UV resistance.
Self-Healing: Many modern PPFs have self-healing properties: minor swirl marks and light scratches vanish when heat (sunlight or warm water) reactivates the film.
UV Blocking Additive: Quality PPFs incorporate UV inhibitors to safeguard not just against physical damage but also the sun’s harmful rays.
Gloss Preservation: Since the film is optically clear, it preserves the depth of your paint color and reflective qualities.
Coverage Options
Full-Vehicle Wrap: Best for those wanting head-to-toe protection—but also the most expensive.
Partial Coverage: Focus on high-impact zones like the front bumper, hood leading edge, fender edges, and mirror housings.
Spot Protection: Target only especially vulnerable areas prone to rock chips or heavy abrasion.
Professional Installation
Template Precision: Installers use digital templates to pre-cut PPF pieces tailored to your vehicle’s make and model, ensuring perfect alignment and minimal seams.
Heat & Squeegee Techniques: A combination of low-heat application and careful squeegeeing eliminates bubbles and ensures a seamless finish.
Edge Sealing: Properly sealed edges prevent the film from peeling or accumulating dirt, preserving its longevity.
Maintenance & Care
Handwashing Preferred: Automated car washes with harsh brush cycles can lift PPF edges over time. Handwashing preserves the film’s integrity.
Regular Inspections: Check for lifting edges or larger scratches that require professional reinstallation or touch-ups.
By combining a ceramic coating over your clearcoat with PPF on high-impact areas, you create a nearly indestructible shell that guards your paint against UV exposure, rock chips, and minor abrasions. The initial investment pays off by extending paint longevity, reducing the need for frequent detailing, and preserving your vehicle’s resale value.

Recognizing & Repairing UV-Damaged Paint
Despite your best prevention efforts, you may still encounter UV damage. Early detection and prompt repair can prevent minor issues from escalating into costly repaint jobs. In this section, the auto body specialists at Park Lane Collision will help you identify common UV-related paint problems and walk you through practical restoration techniques—ranging from simple polishing to full panel repainting.
1. Spotting Fading, Oxidation & Chalking
Identifying UV damage early means you can intervene before it spreads. Here are the telltale signs:
Fading & Loss of Color Vibrancy
Sun-Facing Panels: The hood, roof, and trunk lid typically fade first, as they receive the most direct UV exposure.
Color Shifts: Darker colors like black or deep red may take on a grayish cast. On metallic paints, the metallic flakes become more pronounced—sometimes revealing an “etched” effect.
Oxidation and Surface Softness
Chalky Texture: Lightly run your fingers over the paint; if it feels powdery or rough, oxidation has set in.
Water Spotting: If washed surfaces develop “splotches” or water spots that don’t easily rinse off, acidic oxidation may be occurring beneath the clearcoat.
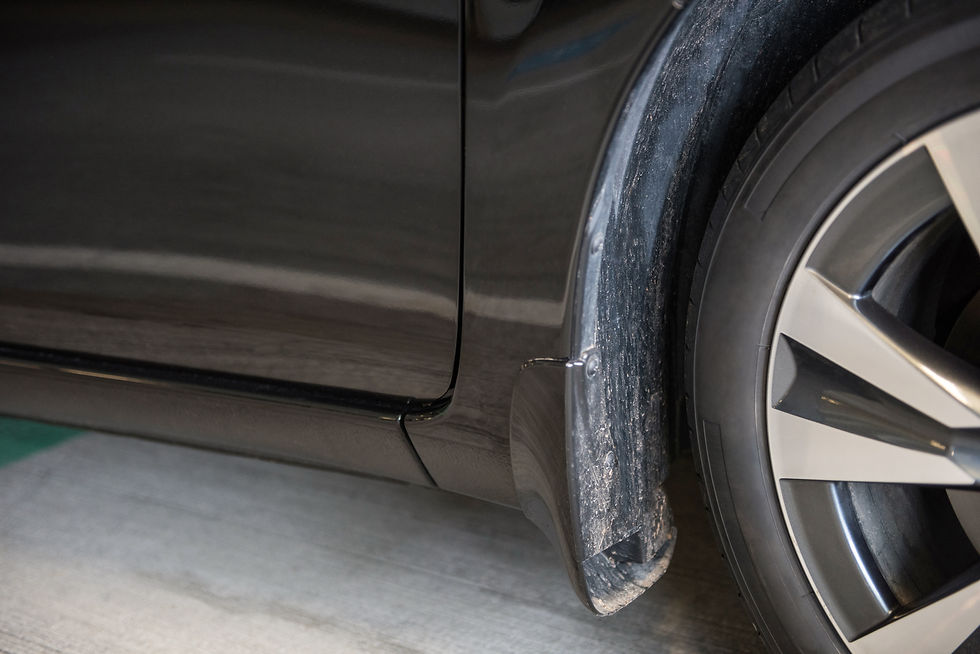
Chalking & Peeling Clearcoat
Fine White Residue: Older vehicles (10+ years) or those left unprotected frequently develop chalky white residue—especially on flat-body panels.
Clearcoat Cracking or Lifting: In advanced stages, clearcoat may crack along edges, especially around door edges and trunk seams. Peeling or flaking clearcoat leaves the basecoat directly exposed to further UV assault.
Once you recognize these early signs—whether a subtle fade in hue or a faint chalky film— it’s time to take action. The sooner you address it, the less labor-intensive and costly the remedial steps will be.
2. Polishing, Compounding & Re-Sealing for Minor Damage
When UV damage is still limited to the clearcoat or slight oxidation, you can often restore gloss and protective properties through compounding, polishing, and re-sealing:
Understanding Compounding vs. Polishing
Compound (Cutting Stage): A mildly abrasive compound reshapes the surface by removing a thin layer of oxidized clearcoat. Ideal for chalky, faded panels.
Polish (Finishing Stage): A finer abrasive that removes micro-scratches left by the compound and brings back deep gloss and clarity.
Step-by-Step Restoration Process
Clean & Decontaminate: Thoroughly wash and clay-bar the panel to remove embedded contaminants. Any remaining dirt or iron particles can scratch the surface during compounding.
Assess the Degree of Oxidation: If the clearcoat is only slightly oxidized, a fine polish may suffice. For more stubborn chalking, start with a medium-grade compound.
Compound Application:
Use a dual-action polisher with a wool or firm foam cutting pad.
Apply compound to the pad, spread it over a 2×2-foot area at low speed (1,000–1,200 RPM).
Increase RPM (1,800–2,200) and apply light pressure, working the compound until it becomes transparent.
Wipe away residue with a clean microfiber towel and inspect.
Polish Application:
Switch to a soft foam finishing pad.
Apply polish similarly—spread at low speed, then increase RPM to refine the surface. The paint should now look glossier and feel smoother.
Seal & Protect: After polishing, apply a thin layer of wax or sealant (as detailed in Section 2) to lock in the restoration and add a new UV-blocking barrier.
DIY vs. Professional ServicesWhile it’s possible to perform minor compounding and polishing yourself—especially with user-friendly dual-action polishers—there’s a fine line between removing just enough clearcoat and taking too much off. Over-enthusiastic compounding can lead to thin spots or even penetrate to the basecoat. For optimal results and zero risk of clearcoat thinning, many Montreal drivers opt for professional restoration at Park Lane Collision. Our technicians precisely calibrate the machine’s speed, pad selection, and compound grade, ensuring your auto body paint regains its original luster without compromise.
3. When to Consider Repainting: Advanced UV Damage
In severe cases—where oxidation has fully penetrated the clearcoat, leaving exposed basecoat or primer—a full repaint may be the only remedy. Here’s how to determine if it’s time for a professional repaint and what that process entails:
Signs You Need a Full Repaint
Visible Primer or Metal: When clearcoat is completely gone, you might see gray primer or metal starting to oxidize. At this stage, the basecoat is useless without a protective top layer.
Severe Chalking & Cracking: Entire panels appear chalky even after compounding, and the clearcoat exhibits fine cracks or delamination.
Uniform Fading Across Panels: If multiple panels (e.g., roof, hood, trunk lid) have uniformly faded beyond minor restoration, a fresh coat of paint with a new clearcoat may be more cost-effective than repeated polishing.
The Repainting Process (Auto Body Expert Edition)
Vehicle Inspection & Estimate: Technicians assess the extent of damage—identifying which panels require partial or complete paint removal.
Surface Preparation: The old clearcoat and basecoat are mechanically or chemically stripped down to bare metal or primer. Any surface rust is properly treated.
Primer Application: A high-quality automotive primer is sprayed to create a smooth, uniform foundation for the new paint.
Color Matching & Basecoat Application: Using advanced spectrophotometers, technicians formulate the exact OEM or custom color. The basecoat is applied in multiple thin layers (typically 2–3 coats) for visual depth.
Clearcoat Spray & Curing: A high-durability, UV-resistant clearcoat—usually a urethane-based formulation—is laid over the basecoat, providing glossy protection. The vehicle is placed in a temperature-controlled booth to ensure proper curing.
Wet Sanding & Polishing: Once cured, paint defects like orange peel or minor drips are corrected by wet sanding, followed by polishing to achieve a flawless finish.
Costs & Considerations
Full Panel vs. Partial Panel: Repainting an entire hood or fender will cost more than spot painting a small section, but mismatched shades can occur if layers differ. Consult Park Lane Collision’s color experts to decide which approach yields the best long-term results.
Warranty & Longevity: A professionally applied paint job—backed by a reputable auto body shop—often includes warranties (e.g., 1–3 years on paint adhesion). High-quality clearcoats with UV inhibitors can last 10+ years with proper maintenance.
Though a full repaint is the most intensive solution, it’s a necessary investment when clearcoat damage reaches severe levels. A fresh, factory-matched finish not only restores your vehicle’s appearance but also replenishes its first line of defense against UV harm.

Smart Habits & Routine Maintenance for Superior UV Protection
Preventing UV damage is not a one-time task; it’s an ongoing commitment that involves daily habits, thoughtful choices, and routine maintenance. By integrating simple practices into your car-care regimen, you’ll significantly extend the life of your auto body paint—saving you money and preserving that head-turning shine. In this final section, Park Lane Collision shares practical tips: choosing shade and garage storage wisely, scheduling regular inspections and touch-ups, and staying vigilant against common UV amplifiers.
1. Strategic Parking & Garage Storage
Where and how you park can dramatically affect the longevity of your paint. Here’s how to use your environment to your advantage:
Shade Over Streetside Exposure
Natural Shade: Whenever possible, park under a tree canopy or next to a building that casts a wide shadow. Even partial shade can reduce UV exposure by 50–70%.
Parking Structures: If you’re in a downtown Montreal area, opt for covered parking garages or lots. These structures cut direct UV exposure and also protect against bird droppings, sap, and acid rain.
UV-Blocking Car Covers
Breathable Covers: If covered parking isn’t an option, invest in a high-quality, breathable car cover with UV protection. Avoid cheap, non-breathable tarps—they trap moisture, leading to mold and micro-corrosion.
Custom-Fit vs. Universal: A custom-fit cover offers snug protection that hugs contours (mirrors, spoilers) and prevents flapping in the wind, which can scratch paint.
Garage Storage Tips
Blackout Curtains or UV-Filtered Windows: Standard garage windows allow UVA rays inside. Installing blackout curtains or UV-blocking window film ensures your car remains shielded even indoors.
Garage Temperature Control: Extreme temperatures (hot summers, freezing winters) can exacerbate clearcoat contraction/expansion and micro-cracking. While fully climate-controlled garages are ideal, even a well-insulated space helps reduce temperature fluctuations.
Routine “Spot Check” ParkingIf you know you’ll park outside for an extended period (a weekend trip or special event), consider rotating your parking position every few hours to minimize prolonged exposure on one side. This simple habit can slow asymmetrical fading.
By being intentional about where and how you park, you reduce the amount of direct UV bombardment on your auto body finish—an easy yet often overlooked way to preserve your paint.
2. Seasonal Inspections & Preventive Touch-Ups
Just as you inspect your furnace or snow tires each season, your car’s paint deserves regular check-ups. Seasonal inspections allow you to catch early signs of UV damage and address them before they worsen.
Spring Check-Up: Shake Off Winter’s Residue
Undercoating & Seal Inspection: Melted ice and road salt from winter can hide under fenders and bumpers. During spring, have a thorough underbody and wheel well wash to remove salt deposits, then inspect for any chipped paint or exposed metal.
Clearcoat Assessment: Examine high-exposure panels (hood, roof, mirrors) for chalky spots or oxidation. If detected, a professional polish or light compounding can restore the clearcoat’s protective barrier.
Wax/Sealant Application: After a deep spring wash, apply a fresh coat of synthetic sealant to prep for UV-intense summer months.
Summer Check-Up: Combat Intense UV & Heat
Monthly Surface Inspections: Quickly rinse off bird droppings, tree sap, and bug splatter—these contaminants are acidic and can break down clearcoat more rapidly under hot summer sun.
Spot Waxing: If you notice diminished water beading, apply a spray wax or sealant to vulnerable spots (especially horizontal surfaces) to reinforce UV defenses.
Ceramic Top-Up: For vehicles with ceramic coatings, consider a quick reapplication of a ceramic spray detailer to maintain hydrophobic properties and UV resistance.
Fall Check-Up: Prepare for Winter’s Assault
Detailed Wash & Seal: Before the city starts salting roads, perform a thorough wash and apply a durable wax or sealant. This “winter prep wax” acts as a sacrificial buffer against salt, preventing it from seeping into micro-scratches under the clearcoat.
PPF Edge Inspection: If you have Paint Protection Film installed, examine all edges and seams. Repair any lifting corners to prevent salt and grime from getting underneath the film.
Minor Touch-Ups: Address small chips or scratches with OEM touch-up paint before they rust; when salt comes into play, exposed metal can corrode within days.
Winter Check-Up: Vigilance Against Salt & Reflection
Frequent Rinsing: In frigid temperatures, ice and slush can lock contaminants onto the paint. After any drive on salted roads, aim to rinse your car—ideally with lukewarm water.
Check for Microchips: Inspect bumper corners, wheel arches, and the lower door panels. These areas take the brunt of salt and gravel spray; repairing tiny chips early prevents larger areas of paint failure.
Cover or Indoor Storage: If possible, park in a garage or under a carport. If not, use a breathable, UV-resistant car cover that fits snugly.
Routine seasonal check-ups and timely touch-ups transform reactive “Oh no!” moments into proactive “Nice work!” steps. Your auto body paint will thank you with fewer fading issues and more lasting shine.
3. DIY vs. Professional Maintenance—When to Call the Experts
While many UV prevention measures can be tackled at home, certain tasks are best left to seasoned auto body technicians. Knowing when to go DIY and when to consult professionals ensures you get the best results without inadvertently damaging your paint.
DIY-Friendly Tasks
Basic Washing & Drying: With proper supplies—pH-neutral shampoo, microfiber mitts, two-bucket method, and drying towels—you can maintain a clean, protected finish.
Applying Wax & Sealants: Consumer-grade waxes and sealants are generally user-friendly; just follow product instructions, and work in shade to avoid rapid product drying.
Visual Inspections & Light Wipe-Downs: Spot-check for early signs of oxidation and address minor dust or tree sap immediately.
When to Seek Professional Help
Heavy Oxidation & Deep Fading: If your paint appears uniformly chalky or you see fine cracks in the clearcoat, it’s time for machine polishing, which requires specialized tools and compounds. DIY kits risk thinning the clearcoat too much.
Ceramic or PPF Installation: Proper application of ceramic coatings or paint protection film demands controlled environments (temperature, humidity) and precise technique to avoid streaks, bubbles, or uneven bonding.
Color-Matched Touch-Up & Repaint: Matching factory colors can be notoriously tricky. Professionals use spectrophotometers and carefully calibrated mixing to ensure perfect matches—crucial for partial repaints or touching up chips. DIY brush-on kits rarely achieve seamless results.
Structural Damage from UV-Related Peeling: If UV damage has progressed to peeling or flaking clearcoat, underlying primer or metal may be exposed. Park Lane Collision’s auto body experts can assess whether a simple strip-and-reseal is enough or if a full panel repaint is necessary.
Cost Considerations
DIY Upfront Savings: Consumer products—shampoos, waxes, sealants—range from $10 to $50, making them an affordable first line of defense.
Professional Investment: High-quality ceramic coatings start around $300–$500 for DIY kits and $1,000+ for professional applications. PPF installations can range from $1,500 (partial coverage) to $5,000+ (full-vehicle wrap), depending on the film quality and complexity.
Value Over Time: Although professional services have higher upfront costs, their longevity and effectiveness in UV protection often result in fewer follow-up interventions—ultimately saving money over the vehicle’s lifespan.
Balancing your budget with the level of protection you desire is key. By handling routine maintenance at home and entrusting complex tasks to Park Lane Collision’s auto body technicians, you’ll keep your Montreal ride looking its best with minimal hassle.
Conclusion
UV damage may be an inevitable fact of life for vehicles, but it doesn’t have to mean a faded, chalky finish. With a clear understanding of how UV rays break down your paint, proactive prevention steps—like regular washing, high-quality waxes, and advanced coatings—and timely restoration techniques, you can safeguard your car’s auto body for years to come. Remember, Montreal’s climate—with intense summer sun, reflective winter snow, and urban pollution—amplifies UV’s effects, so a comprehensive strategy is essential.
Whether you’re a weekend DIY detailer or prefer to leave it to the pros, the auto body experts at Park Lane Collision are here to help. From precision polishing to ceramic coating applications and full paint corrections, our team combines local know-how with industry-leading tools to ensure your ride turns heads—no matter how strong the sun shines. Ready to give your paint the protection it deserves? Reach out to Park Lane Collision today, and let’s keep your car’s finish looking flawless for miles ahead!