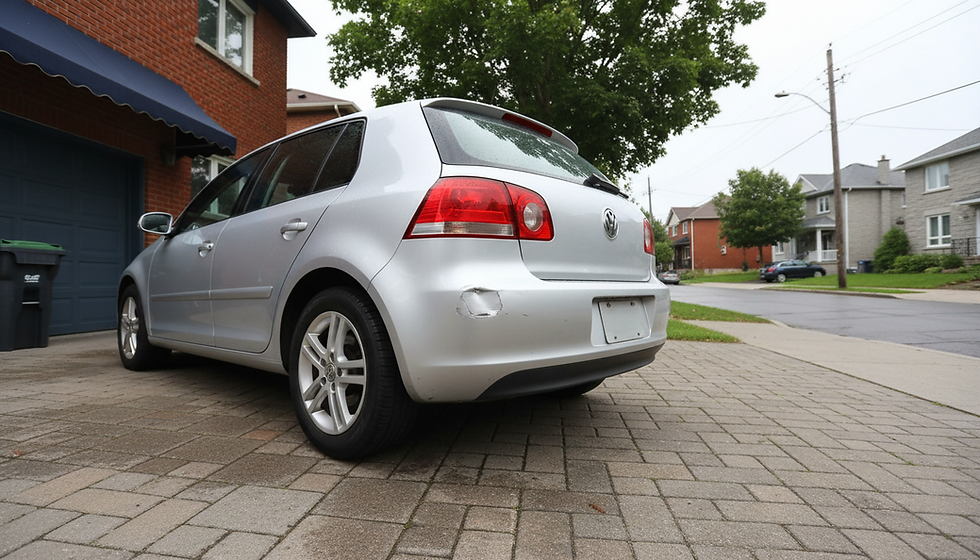
How Auto Body Shops Repair Cracked and Scraped Bumpers
A bumper can look far worse than the damage really is. A scrape from a concrete pillar, a crack from a low-speed tap, or a gouge from winter road debris can leave rough plastic, loose paint, and an ugly mark across the front or rear of the vehicle. The good news is that many bumper covers can be restored without replacing the whole part.
Most modern bumpers are plastic covers mounted over impact-absorbing materials. That outer cover is designed to flex, but it can still crack, split, scrape, or lose paint. The right fix depends on the depth of the damage, the type of plastic, and whether any hidden parts behind the cover were affected.

Auto Body Shops: Technicians start with a careful damage inspection
Before sanding or painting begins, the technician checks more than the visible surface. A bumper cover can spring back after a minor collision while brackets, tabs, clips, foam absorbers, or sensor mounts behind it stay damaged.
The inspection usually looks at:
Cracks and splits
The technician checks whether the plastic is cleanly cracked, stretched, missing material, or broken near an edge.
Paint damage
Light scuffs may stay in the clear coat. Deeper scrapes cut through colour and primer into bare plastic.
Attachment points
Broken tabs can make the bumper sag or pull away from the fender.
Hidden components
Parking sensors, blind spot system parts, fog lights, grilles, and wiring may sit behind or inside the bumper cover.
In a place like Montréal, winter damage is common. Cold weather makes plastic less flexible, and road salt, ice chunks, and tight parking spaces can all add wear. A proper inspection helps decide whether the bumper should be refinished, plastic-welded, or replaced.
Scrapes are sanded, filled, and refinished
Scraped bumpers are usually easier to fix than cracked ones, as long as the plastic is not torn or deeply gouged. The technician starts by cleaning the area to remove wax, dirt, salt, and road film. Paint materials do not bond well to contamination.
Next comes sanding. The damaged paint edges are feathered out so there is no hard step between the scraped section and the original finish. If the scrape has cut into the plastic, the shop may use a flexible filler made for bumper materials. This filler has to move with the plastic instead of becoming brittle.
Once the surface is shaped, the technician applies primer. Bare plastic often needs a special adhesion promoter first, because bumper covers do not accept paint the same way metal panels do.
The refinishing steps often include:
Sanding the damaged area smooth
Applying flexible filler where needed
Priming the prepared section
Colour matching the paint
Spraying base coat and clear coat
Polishing after the finish cures
Good colour matching matters. Factory paint can fade over time, especially on vehicles parked outdoors. Skilled painters compare the vehicle’s current colour, not just the paint code, so the new finish blends into the surrounding panels.

Cracks need strength before paint
A cracked bumper cannot be fixed with paint alone. If the plastic is split, the structure has to be joined and reinforced first. Otherwise, the crack can reopen when the bumper flexes during driving, parking, or temperature changes.
Many cracked bumper covers are removed from the vehicle so the technician can reach both sides. The damaged area is cleaned, aligned, and prepared. Depending on the plastic type and crack location, the shop may use plastic welding, repair adhesives, reinforcement mesh, or a combination of methods.
The back side of the crack often gets the strongest reinforcement. This helps keep the outside surface smooth while giving the bumper support where it needs it most. Once the crack is stable, the outside is shaped, filled lightly if needed, sanded, primed, and refinished.
A crack near a mounting tab can be more complicated. Tabs hold the bumper cover in place, so they need to line up properly with the fender, grille, and lights. If a tab is missing or the plastic is badly stretched, replacement may be the safer and cleaner choice.
This is where experience matters. Many auto body shops can make a bumper look smooth, but the better result is one that also fits properly and stays secure.
Some bumpers should be replaced instead of fixed
Not every bumper cover is a good candidate for cosmetic work. A shop may recommend replacement when the damage is too severe, the plastic is distorted, or important attachment points are gone.
Replacement is more likely when:
The bumper has long cracks through high-stress areas
Large pieces of plastic are missing
Several mounting tabs are broken
The cover is warped and cannot hold its shape
Sensor mounts or light openings no longer line up
Previous poor repairs are failing under the paint
Replacement does not always mean a faster job. A new or recycled bumper cover may arrive unpainted, so it still needs preparation, colour matching, painting, and installation. If the vehicle has parking sensors or driver assistance features, those parts may also need to be transferred or checked.
The right choice comes down to safety, fit, appearance, and long-term durability. A smaller crack in a repairable spot can often be restored well. A badly torn bumper that keeps pulling out of place may cost more to chase than to replace properly.

Paint blending gives the bumper a factory-like finish
The final finish is what most people notice first. After structural and surface work, the painter masks the surrounding areas, applies the colour coat, and seals it with clear coat. Clear coat gives the bumper gloss and helps protect the colour underneath.
Bumper paint also needs flexibility. Since plastic expands, contracts, and flexes more than metal, the paint system must suit the part. Shops use products and prep methods made for plastic panels so the finish resists cracking and peeling.
After painting, the bumper is reinstalled and aligned. The technician checks panel gaps around the fenders, headlights, trunk, tailgate, and grille. Clips and fasteners are replaced where needed. Lights, sensors, and trim pieces are tested or checked before the vehicle leaves.
A quality job should not draw attention to itself. The bumper should sit evenly, the colour should blend with nearby panels, and the repaired area should feel smooth to the touch.

A good bumper fix is more than cosmetic
Cracked and scraped bumpers are common, but the process to fix them takes real judgement. The technician has to know when to sand and refinish, when to reinforce cracked plastic, and when replacement is the better answer.
For small scrapes, the job may be mostly surface preparation and paint. For cracks, strength has to come first. For larger damage, fit and hidden components matter as much as colour.
The best result is simple: the bumper looks right, lines up properly, and holds up through regular driving, weather, and washing. If damage goes beyond a light scuff, a professional inspection is the safest way to find out what the vehicle really needs.